“I learned very early the difference between knowing the name of something and knowing something.”
I initially wanted to name this article ‘6 Rules’ but some would say rules are only idealistic and not meant to be followed. Therefore I call these ‘Steps’ because steps are essential, taking steps elevate you, they will get you somewhere, perhaps a remarkable Step score. Studying premade cards may be ideal for board exams but you will need to create your own cards from lecture material or other resources in order to do well on your school exams.
Anki is a powerful tool for memorizing anything, especially the truck-load of information that is medical school. It’s not enough to have a shallow understanding of the material, we’re expected to know information in great detail. The first step in learning anything is understanding, and once that process is over, one must memorize all the details so as to be able to teach others without referring to notes. This is true mastery. The steps I lay out in this article are universal to making flash cards from any material whether you’re studying for an exam or learning a language. I use examples in medicine since most of my readers are medical students. You can use these tips to create high yield Anki cards from text-books, lecture slides, YouTube videos, or any other resources you use to study.
Step #1: Do Not Make Cards for Every Detail
One pitfall most new Anki users fall into is making too many cards at the beginning soon to only realize that the burden of reviewing becomes overwhelming. Anki’s spaced-repetition algorithm works best only if you complete all of your scheduled reviews daily. This is why you should only make cards on facts that are high-yield and details that are easy to forget. Now you may be asking, ‘How do I know what’s high yield?” Here’s the mystery and art of figuring that out. This power will come to you naturally day by day as you write cards, but for now you must think like an exam maker. This means doing practice questions relevant to your study material daily. This gives you a good guage on knowing what’s most likely to be tested. At the beginning, only create high-yield cards and later add more cards to fill in the holes in your knowledge by referring back to the source. This ensures that your card numbers stay managable and you’re using the spaced-repetition system to its fullest potential. Always check to see if there are cards already made for a topic in a pre-made deck so search and unsuspend those cards to avoid redundancy.
Step #2 Use Cloze-Deletion Cards
Cloze Deletion is a fancy term for ‘fill in the blank’. Some of you might be questioning why I only use this type of note when creating text based cards instead of basic (traditional) cards where there’s a front and a back. The reason is because it’s been shown to be more effective and saves you time in the long run. The cards you make are special, meaning you should almost never delete them since you’re going to spend so much time making them. Cloze cards allow you to blank out multiple key terms from a sentence.
Let’s run through an example to see why Cloze cards are superior to Basic cards. Let’s say you want to memorize this fact: ‘A leads to B because of C’. With Cloze cards, you can just blank out terms by highlighting A, B, and/or C and pressing […] or Command+Shift+C so the sentence looks like ‘{{c1::A}} leads to {{c2::B}} because of {{c3::C}}’. Once you do that and click ‘Add’ or Command+Enter, Anki will create three cards which will promt you to recall A, B, and/or C separately. The deletions are indicated by {{c#::}} where # indicates which terms should have their own card. If you were to do this with a traditional card, you would have to create three different cards to test each fact one at a time plus the ambiguity of not knowing what’s actually being asked. One important thing to keep in mind is to create cards that ask you to recall facts forward and backward. You will elevate your memory by adding this simple extra step.


Step #3: Write Only One Fact Per Card
This rule is in fact one of the most important when it comes to making cards and being able to pleasurably review them especially when the card numbers start to pile up. Use only one fact/sentence per card. Do not type in multiple sentences or paragraphs. Eliminate all fluff and jargon so you’re only left with the most valuable information. Use proper grammar so you’re not staring at a card for minutes while your subconcious grammar police tries to figure out what crime has been committed. Be sure to also tag every card that you create using the hierarchical tagging system where each tag is separated by two colons (ex. #term1::exam1::genetics or #term1::exam1::biochem)
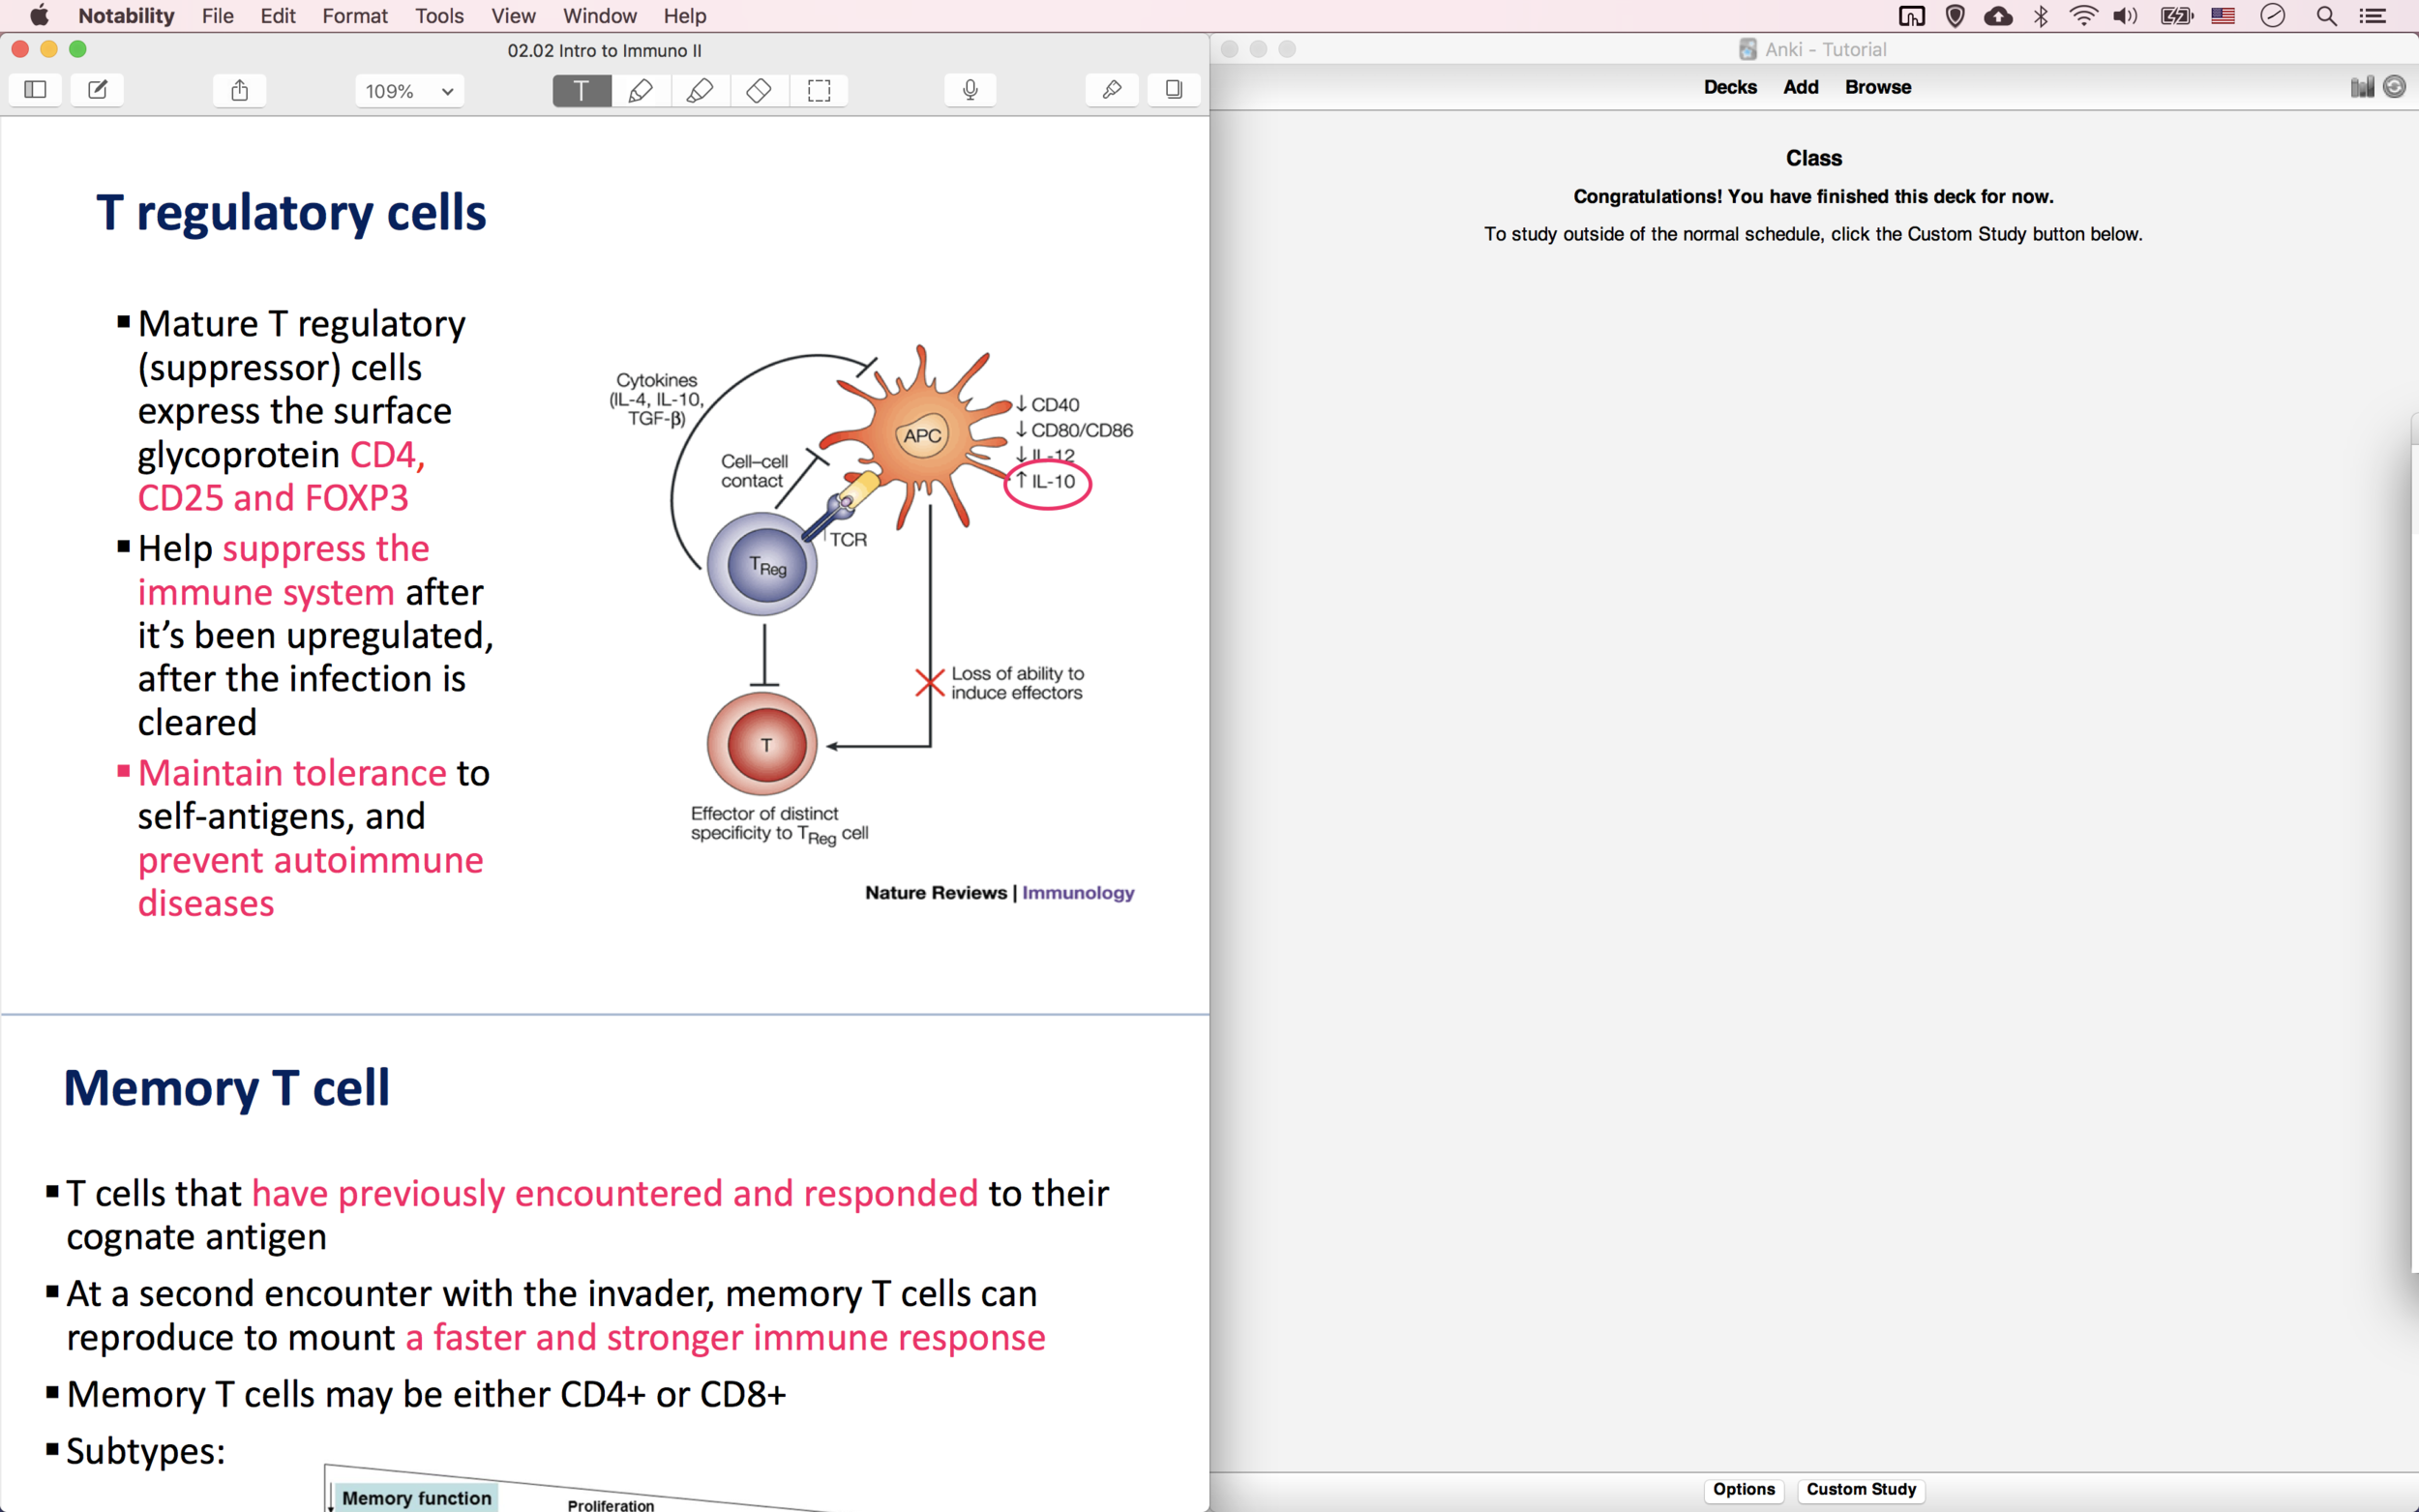
Step #4: Use Images / Tables / Diagrams + Occlusions
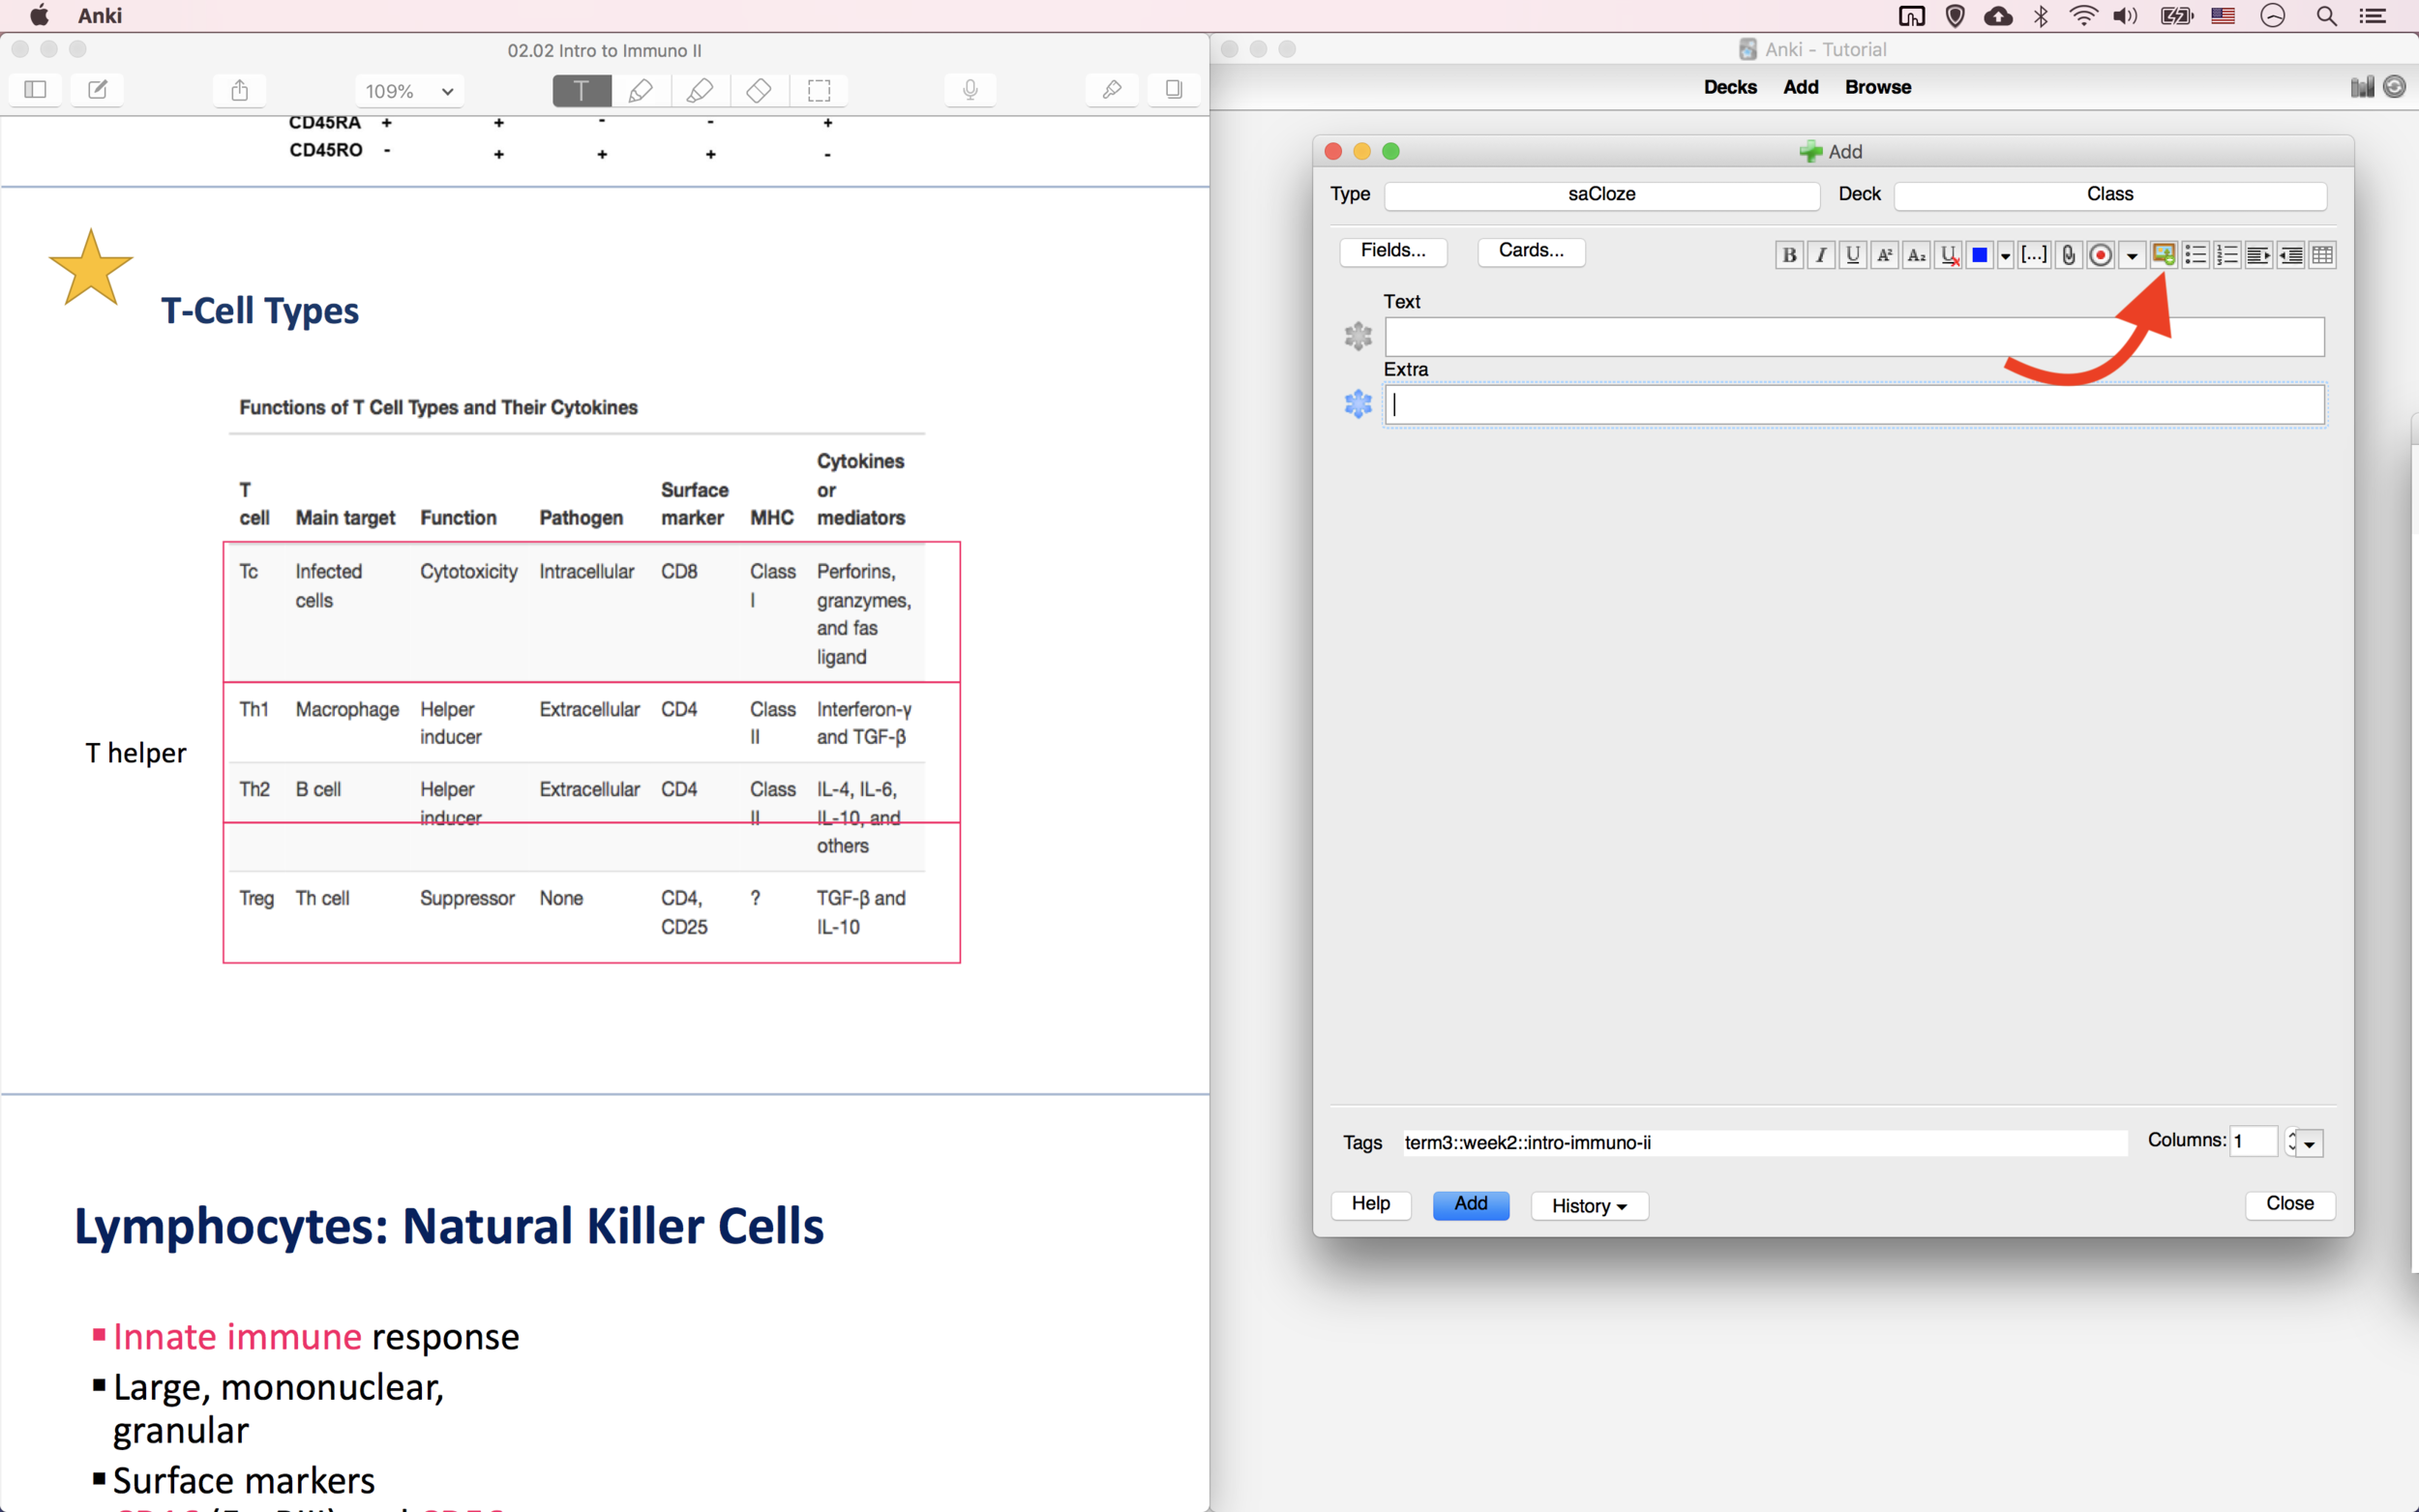
There should be an ‘Extra’ section for all your text based cards. Use this space to add images or relevant information so that it shows up on the back of the card. Some material which comes in the form of images or diagrams may be time consuming or even tough to translate into words. Use the image occlusion add-on for these instances. It’s a very simple add-on but refer to my other articles to get all the details on how to use it. Once you have that addon, you can screenshot an image, click the IO icon on the Add screen, and it will allow you to blank out parts of the image you want to be tested. Use only high quality images with legible font so you don’t have to zoom in every time that card shows up.
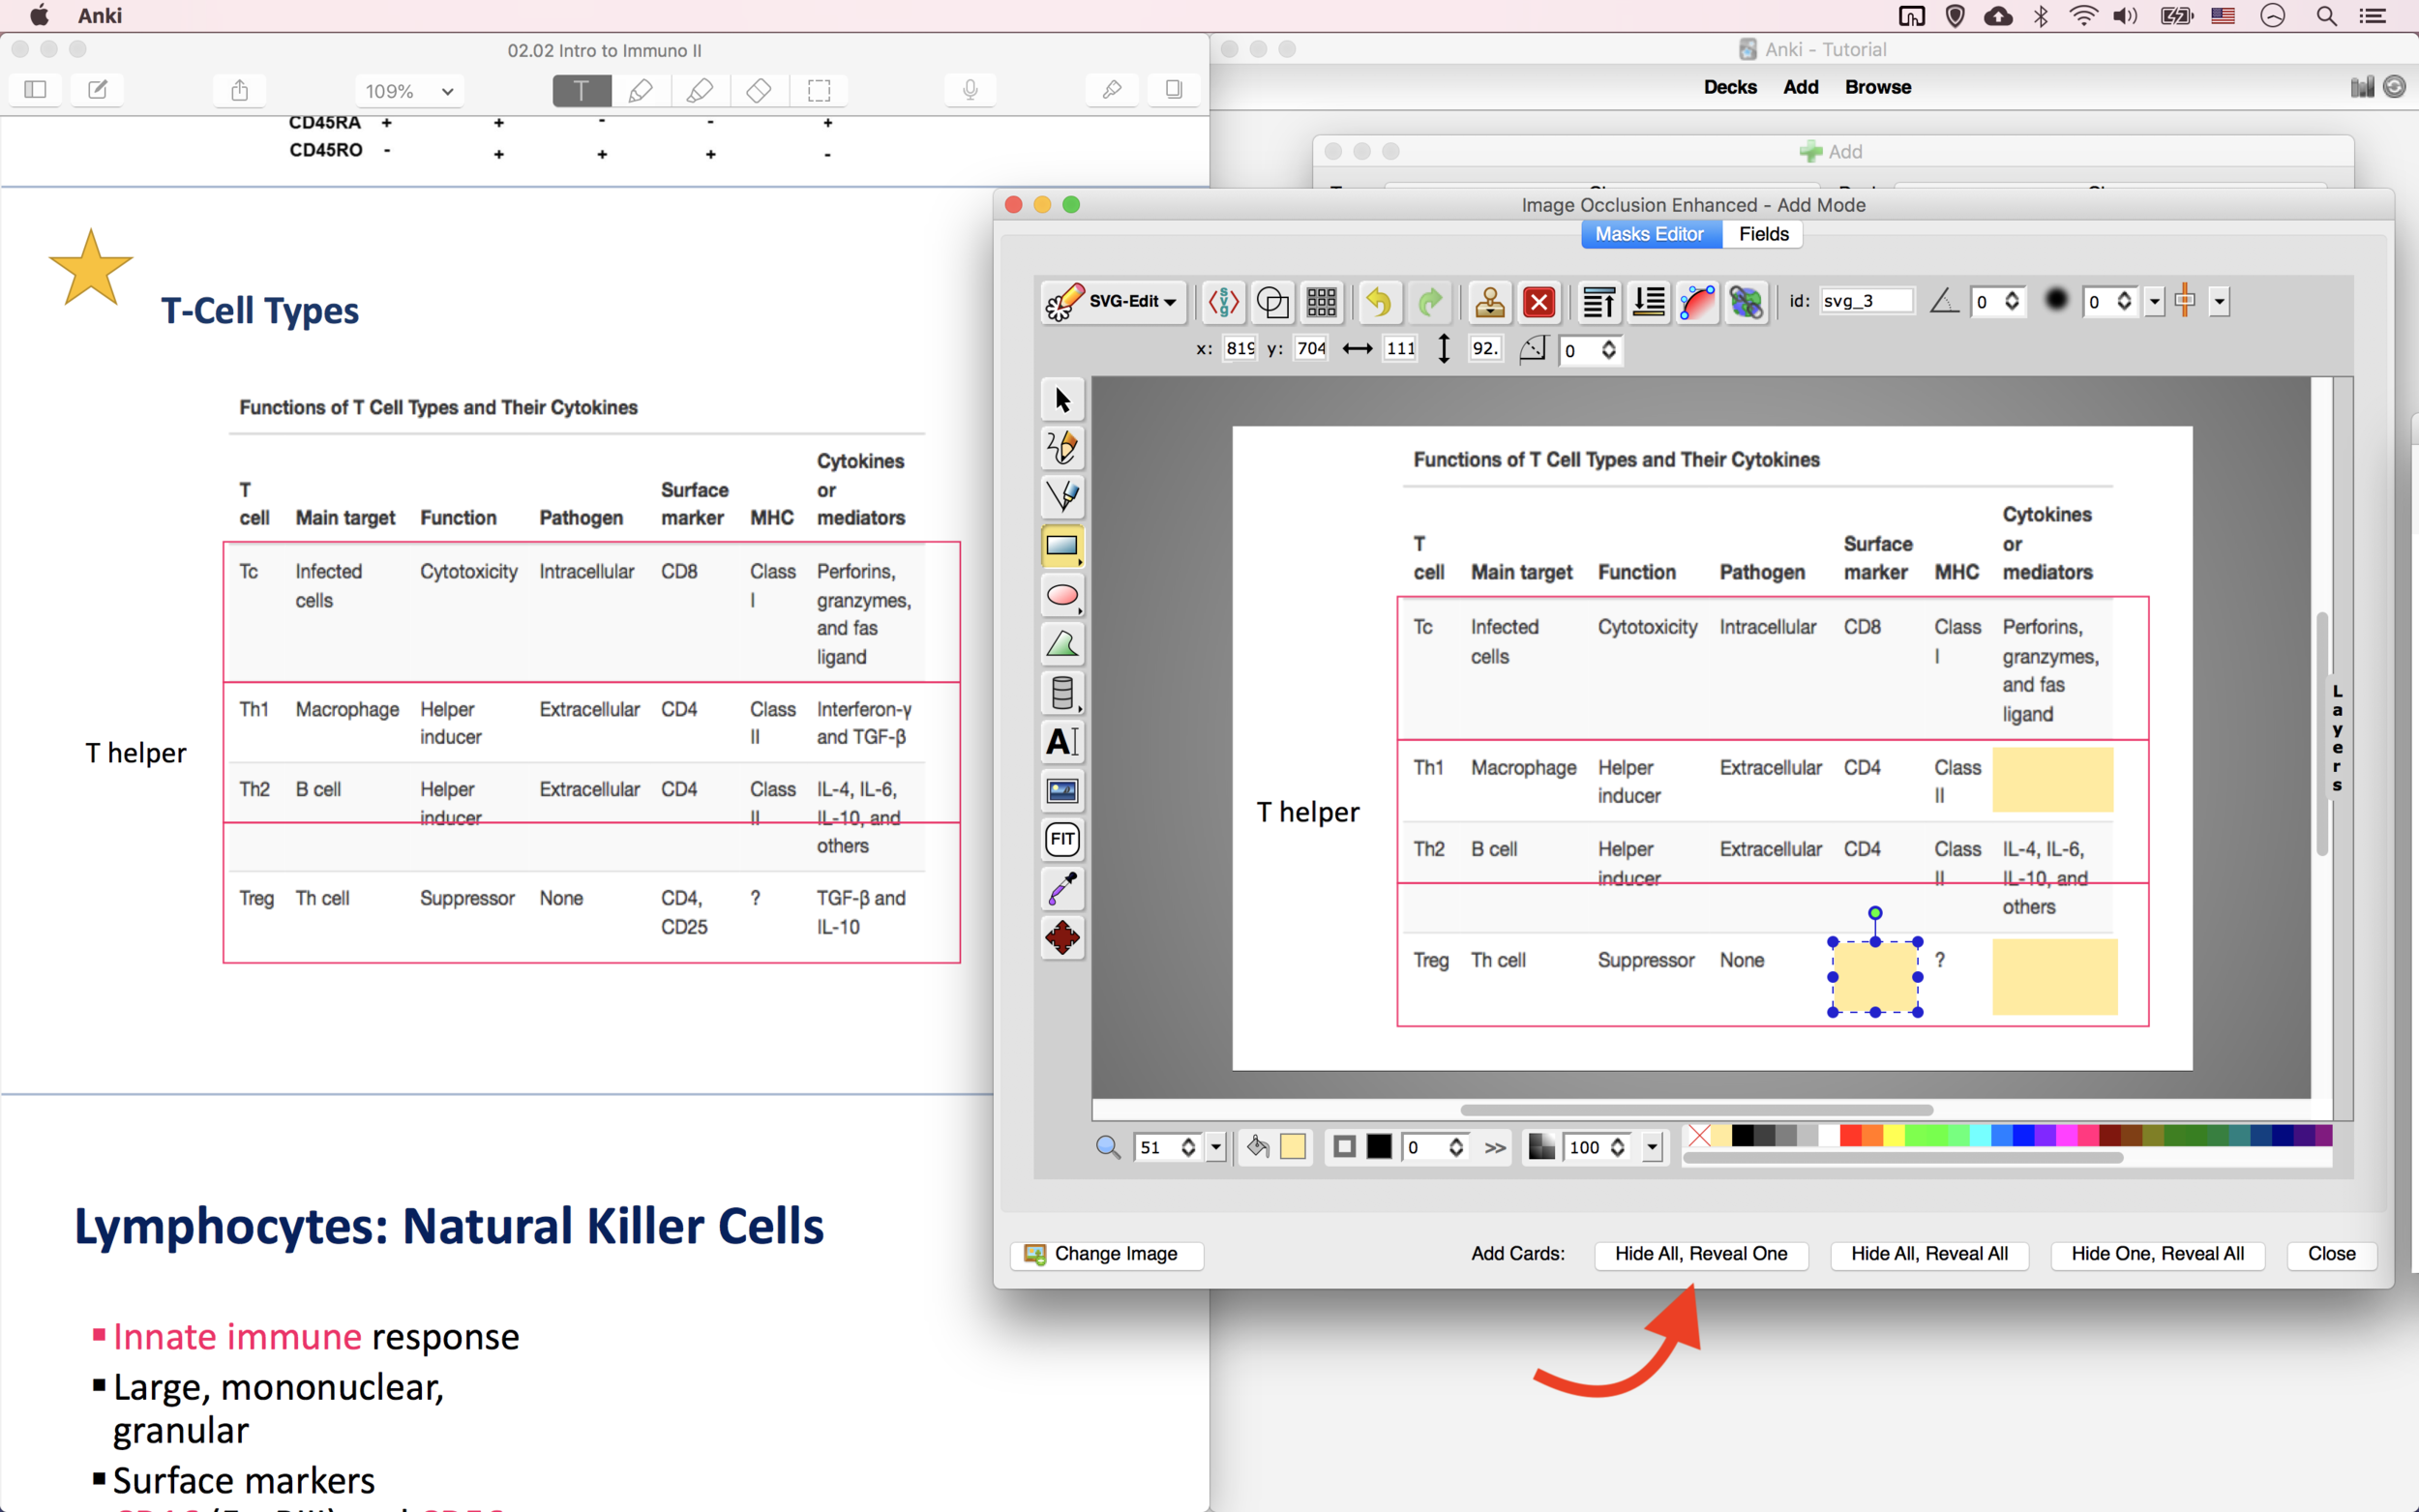
After blanking out sections you have to decide how you want those cards to test you. You have three options:
Hide All, Reveal One → Blanks out everything and shows only the answer (ideal for most situations)
Hide All, Reveal All → Blanks out everything and shows everything on the back
Hide One, Reveal All → Blanks out only the cue and shows everything on the back
Step #5: Memorize Lists Forward and Backward
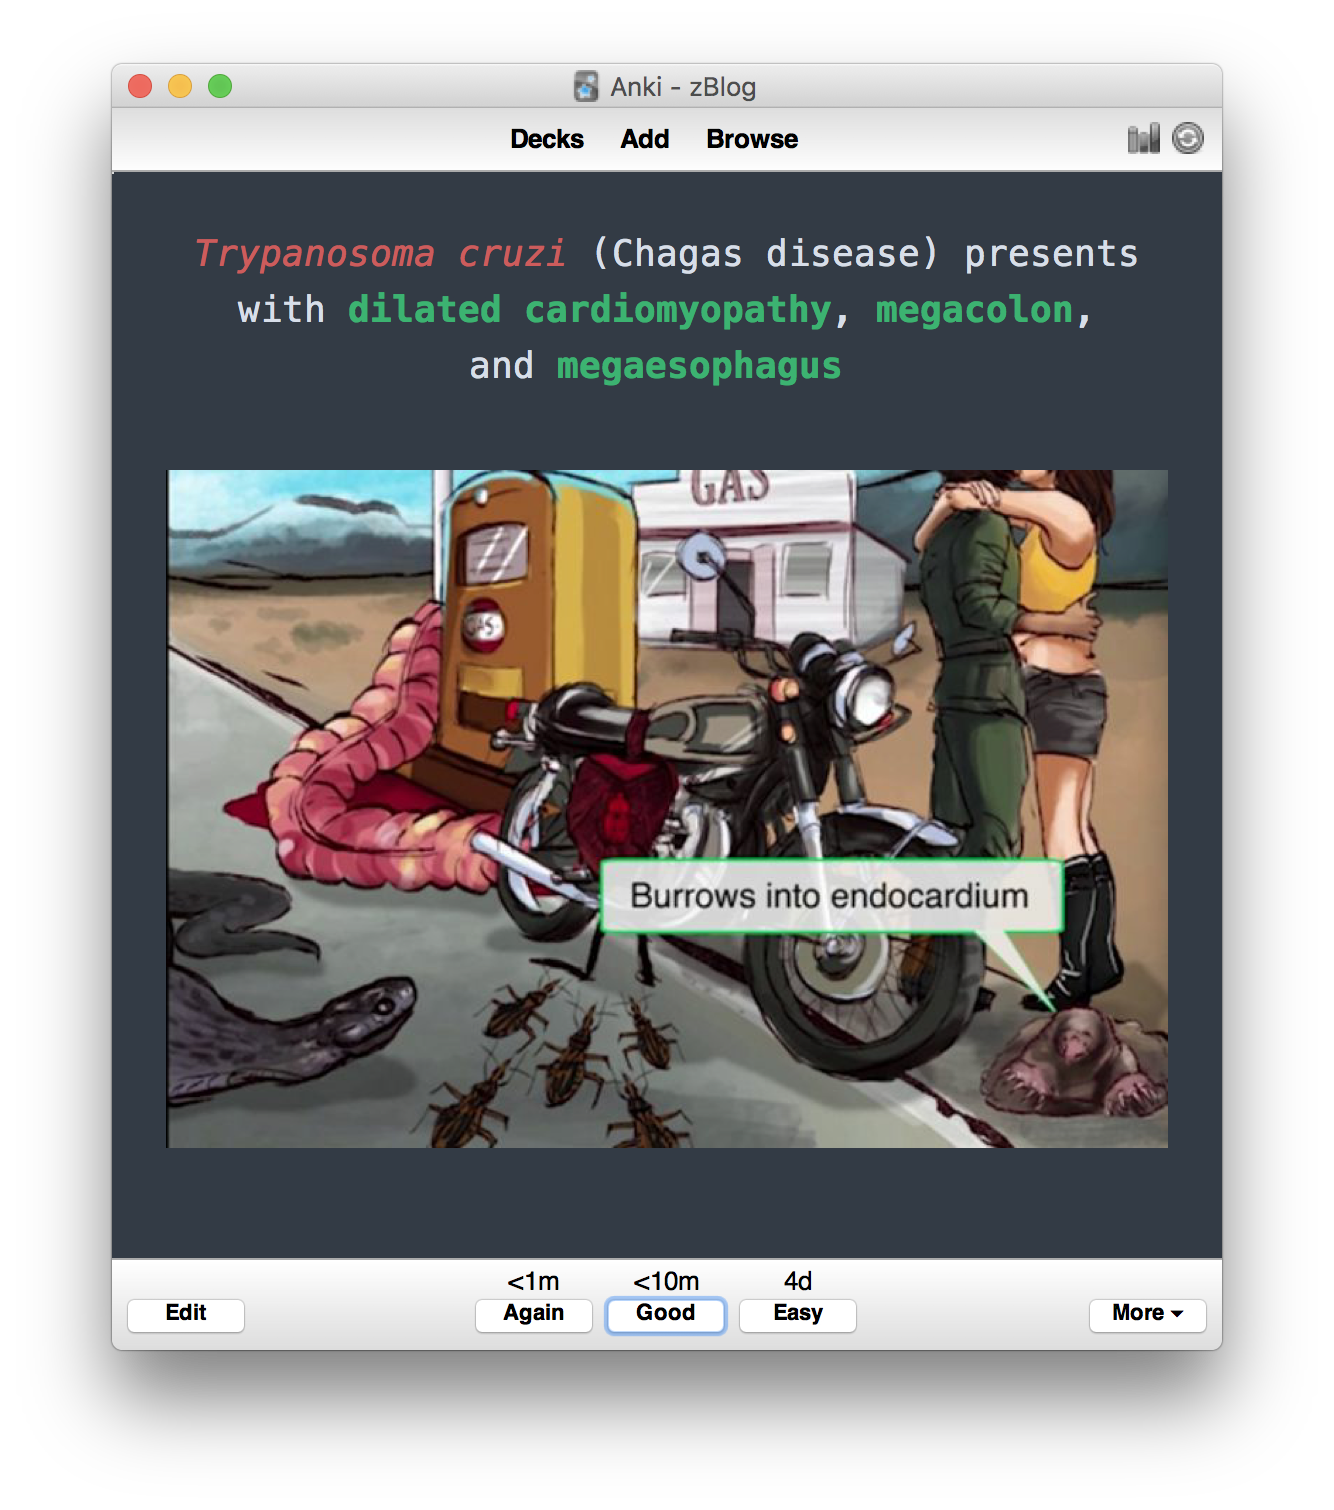
Lists are everywhere and they are an essential part of the medical curriculum whether you’re learning the inhbitors of Acetyl-CoA-Carboxylase or the drugs used to treat a condition. Let’s say for example disease Q presents with symptoms X, Y, and Z. You need to be able to recall symptoms X, Y, and Z given the disease name as well be able to recall the disease name given all the symptoms. Think of the symptoms (or any items in a list) as being fingerprints which are unique to a disease (or any list topic). Eliminate ambiguity by writing very specific sentences and give yourself just enough clues to not give away the answer. I like making two cards for list items, one that asks for each item one by one, and one that asks for all the items in the list. Be sure to stick to the foward-and-backward principle and well as a maximum of three or four cloze deletions per card. Here’s an example to illustrate the point:
Note 1 (Recall items one by one)
Disease Q presents with symptoms {{c3::X}}, {{c2::Y}}, and {{c1::Z}
Note 2 (Be able to recall all items in a list and the list name)
{{c2::Disease Q}} presents with symptoms {{c1::X}}, {{c1::Y}}, and {{c1::Z}


Rule #6: Up Your Efficiency by Using Shortcuts
One thing we’re all limited by is time. Everyone has 24 hours in a day and 168 hours in a week. Every minute is valuable as a medical student. Since you’re spending so much time studying, changing a few things here and there will eliminate hours of wasted time every week. Following are computer shortcuts I use to save time. You can change these shortcuts in the preferences section of your computer.


Screenshot to Clipboard → Alt+4
Screenshot to Desktop → Alt+3
Copy → Command+C
Cut → Command+X
Paste → Command+V
Anki Keyboard Shortcuts:
B → Browser
D → Deck List
A → Add Card
E → Edit Card
O → Options
Space → Show Answer / Answer Good
Command+Z → Undo
Command+L → Show Card Design
Command+Enter → Add Card
Leave a comment below if you have any questions or want to make suggestions for future articles.
-Shamim Ahmed


